Anyone who owns a chainsaw will tell you just how incredible they are. With effortless power they make light work of felling trees, trimming branches and then cutting them up for disposal. Naturally, by hand such tasks will take a great deal of time and effort, so increased productivity is another benefit you gain from these great tools. If you’ve yet to invest in one of these fantastic garden tools, SGS has a wide range of different sized petrol models to choose from.  There’s a bit of an assumption by some that chainsaws are problematic and require a lot of maintenance, but this really isn’t the case. Our models are durable and reliable and while chains may need replacing after a time (should they break or from general wear and tear) the process of doing this is actually quite straightforward. As proof of this – and for some friendly help and advice – in the latest of our how to guides, SGS shows you how you can easily and safely change the chain on your SGS chainsaw. See the step-by-step picture how-to guide below. Remember, keep your chain and guide bar well lubricated to get the maximum working life out of your chainsaw. A final point to consider along with this guide though is that for safety reasons your chain should always be in a decent condition and never try to cut something with a blunt chain. Don’t put off the task of fitting a replacement, follow our guide and in no time at all you’ll be back working efficiently and above all safely.
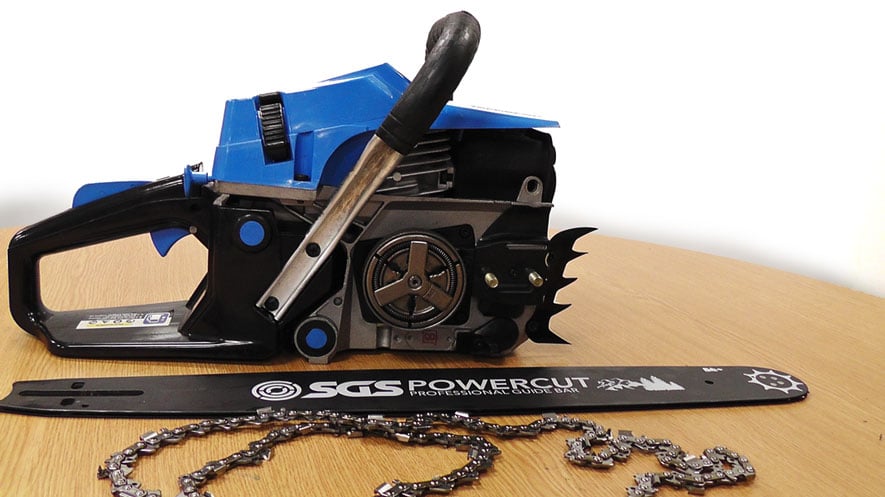
What You'll Need...
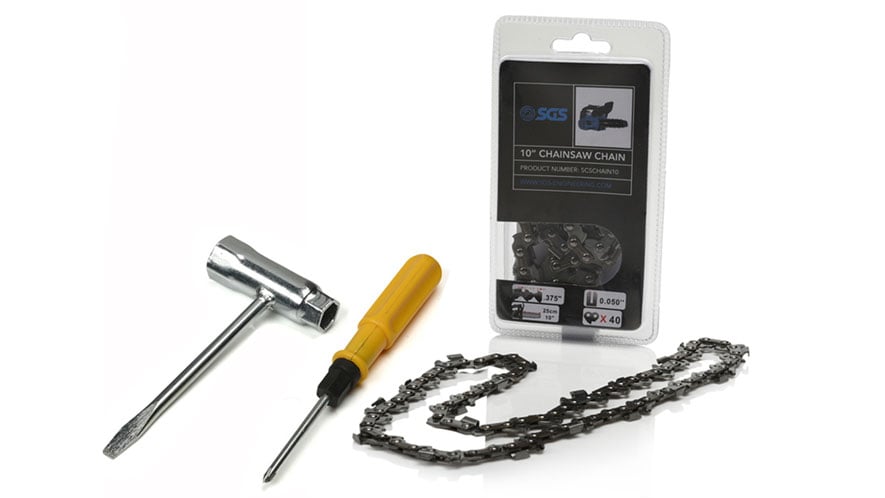
Before we begin the process, there are certain items you are going to need; A replacement chain which must be the right fit for your model. A wrench and/or flathead screwdriver for taking the chainsaw apart and tightening (you can find this in your SGS Chainsaw toolkit), and a pair of tough gloves.[/caption]
Step One
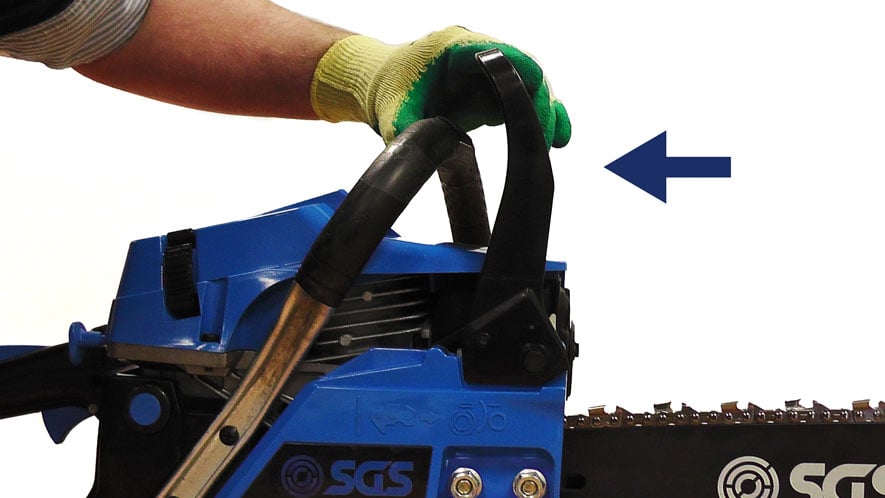
Pull the chain brake back to ensure the chainsaw is safe to work on.
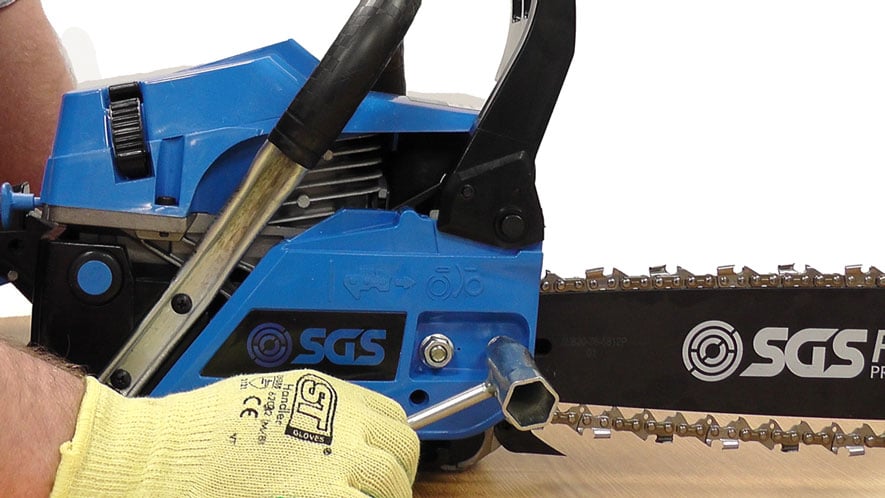
Step Two
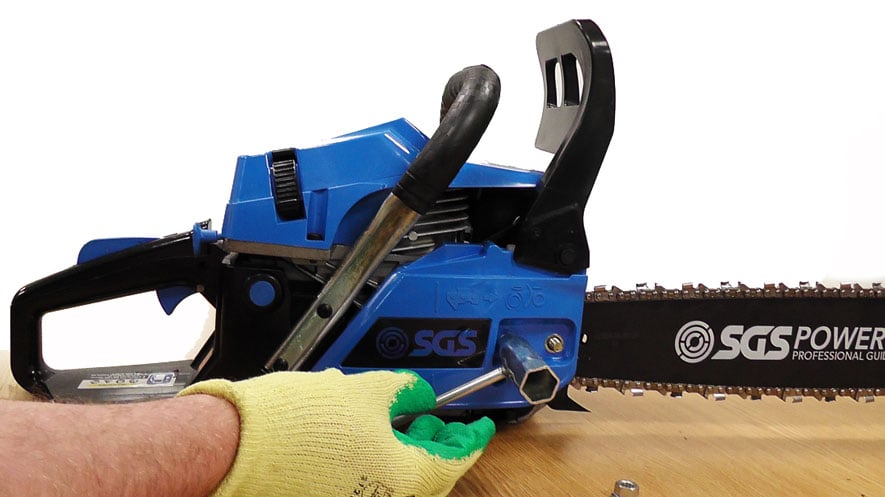
Locate the plate on the side, which on our models has two nuts securing it (on the opposite side of the pull mechanism). You then need to unscrew these to remove the plate and gain full access to the chain.
Step Three
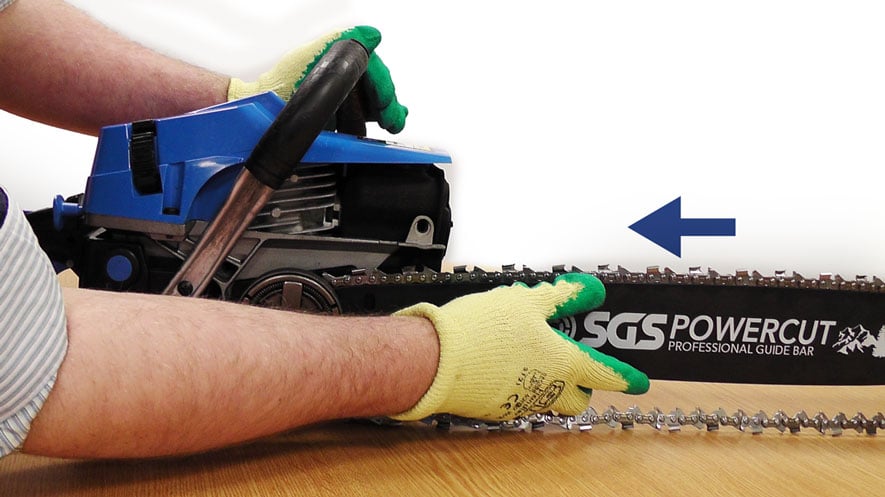
Clean off any excess dust –and pull the chainsaw’s guide bar forward slightly to loosen it.
Step Four
You can also remove the bar and clean it from excess dust and grime at this point if you wish. Replace the bar back on the bolts after the clean.
Step Five
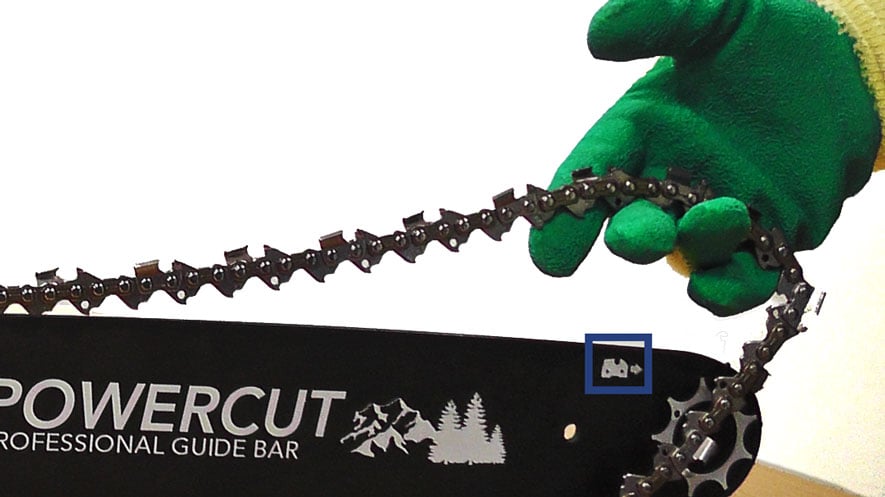
Wearing safety gloves carefully hold your new chain with the teeth pointing in the right direction (which is indicated on our chainsaws).
Step Six
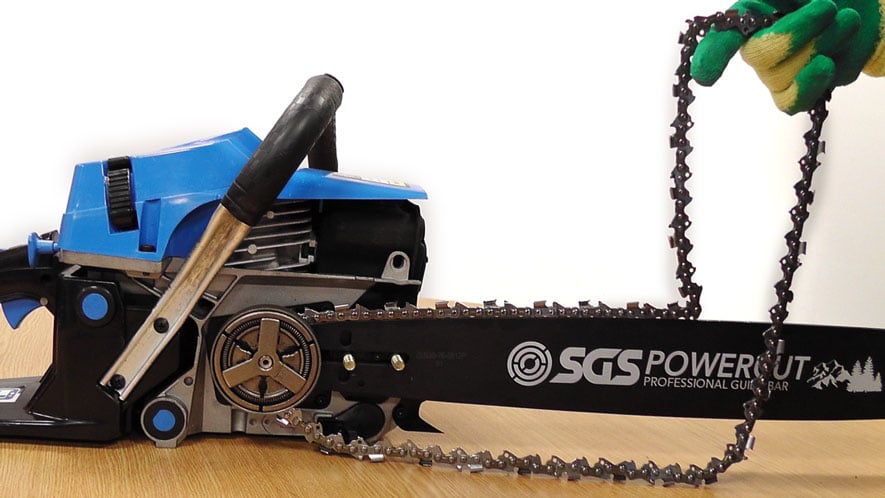
Now wrap the new chain around the chainsaw’s drive gear qnd carefully drape this over the top of the guide bar.
Step Seven
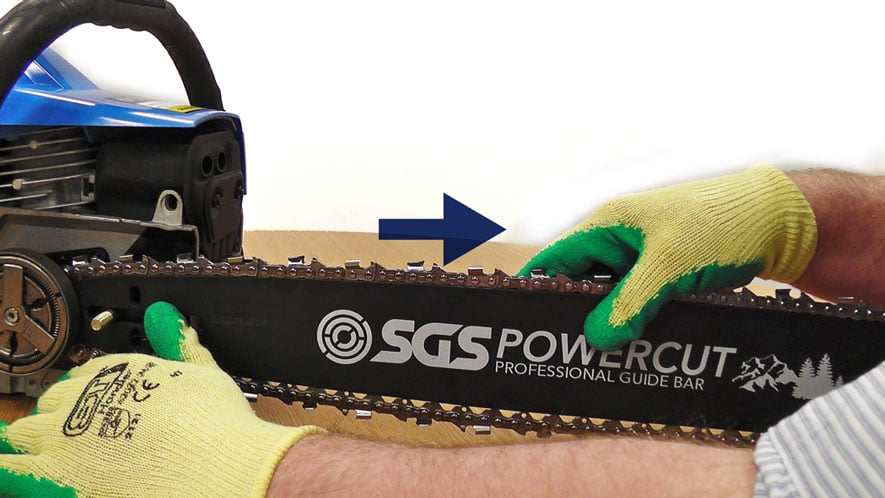
With the chain in place, pull the end of the bar away from the chainsaw to add tension and tighten the chain to the bar. Be careful to ensure it is still aligned.
Step Eight
Position the side plate back in the right place and reattach it, don’t overly tighten the nuts yet though.
If the plate doesn't fit...

Make sure the tension pin is aligning with the hole in the chain bar. You can adjust the position by applying pressure to the pin while you twist the tensioning screw.
Adjusting the Tension...
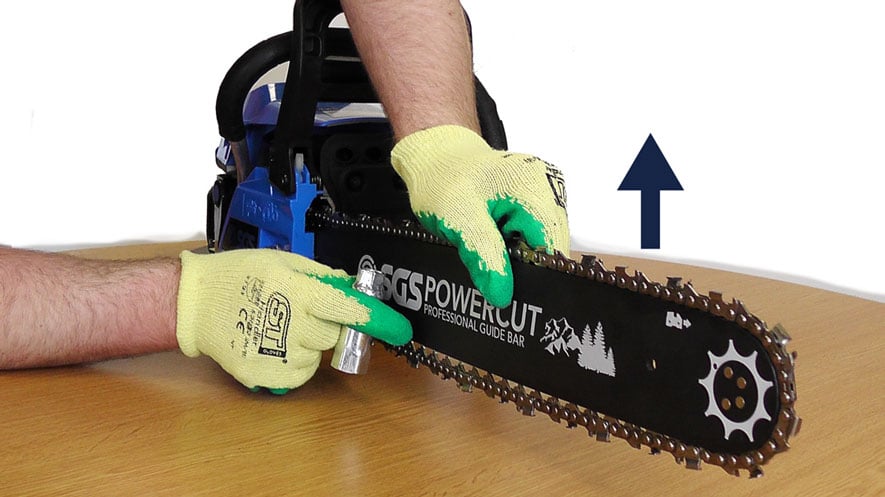
When tensioning the chain the guide bar needs to be pulled upwards to simulate the tension created when cutting.
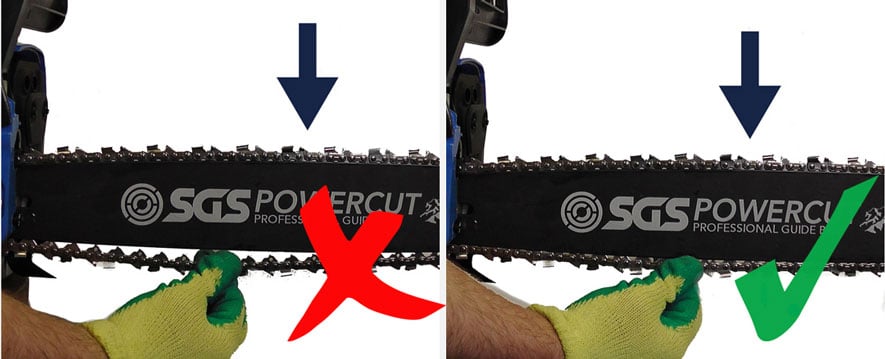
To ensure the chain fits correctly on the chain bar, pull gently up and down and adjust tension screw until the chain can barely be moved away from the chain bar.

The tensioning screw is located next to the bar. Twist it clockwise to tighten the chain. You can use the screwdriver end of the wrench included in your toolkit to make the adjustments.
Tighten the nuts on the chain case...

Now, you can fully tighten the nuts on the chainsaw’s side plate and there you have it - your chain is now replaced.