


 4.4 out of 5 with 50,000+ reviews
  Free delivery on orders over £75*
  Next working day delivery available*
 How to Clean a Carburettor

Cleaning a carburettor isn't hard but there's more to it than simply spraying solvent in the carburettor throat. The carburettor is responsible for supplying the engine with fuel and air in a very specific ratio to do this the carb relies on various passageways and orifices, but sometimes those little holes can get clogged - when they do it's time to take the carburettor apart and give it a good cleaning.
What you'll need
- Phillips screwdriver
- Flat screwdriver
- Gloves
- Old toothbrush
- Aerosol solvent
- Compressed air
- Thin wire (I find the bristles from a brass brush to be perfect for this task but I also know that some people swear by guitar strings)
Step 1
You're going to want to begin with a clean work surface, as you will be working with a lot of small parts. Safety glasses and latex gloves are a must when dealing with carburettor cleaner and compressed air.
Step 2
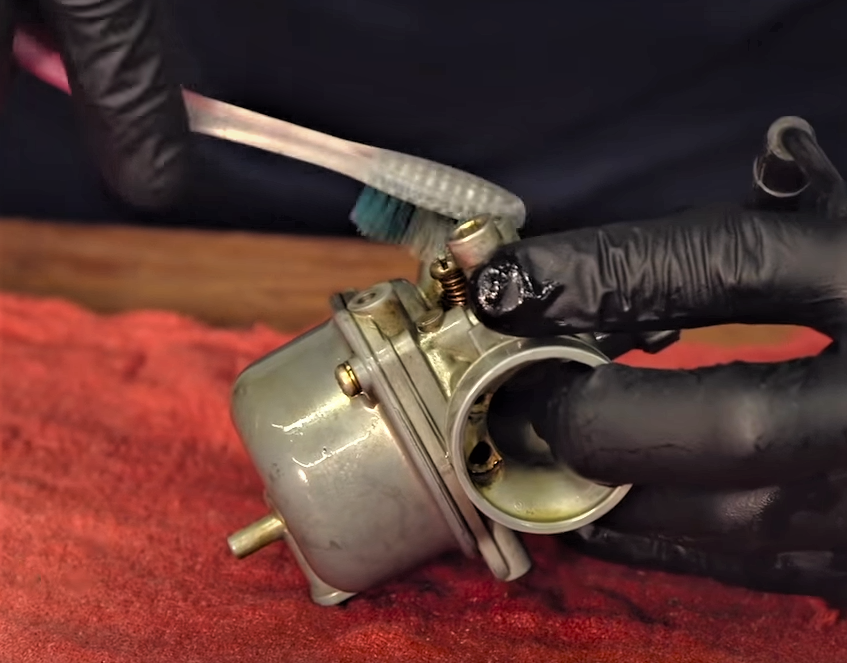
The first thing you need to do is drain the carburettor and remove it from the vehicle or tool. Next we're going to clean the exterior of the carburettor with the aerosol solvent and our old toothbrush
Step 3
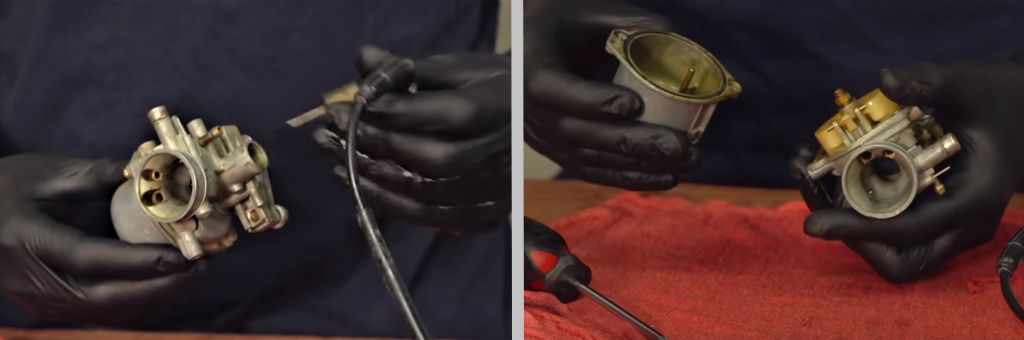
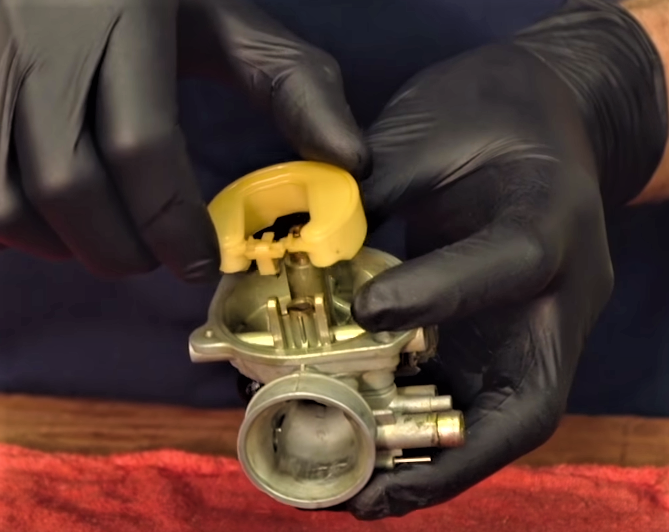
Now unscrew or unbolt the carburettor top and remove the piston. Then flip the carburettor over and using the Phillips screwdriver remove the flow bowl. If the inside of the flow bowl is full of goo or crust use the aerosol cleaner and toothbrush to clean it out.
Step 4
The next step is to remove the float by removing the float Bowl hinge pin, then the float just lifts away and it brings the float needle with it. You're going to want to take a close look at the float needle. If it's got a ring worn in the tip it's time to replace it.
Step 5

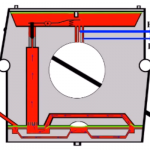
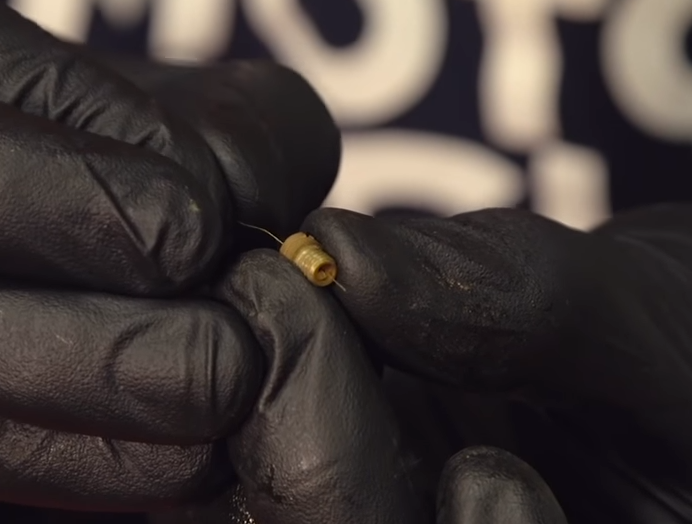
Now it's time to remove the jets. The bigger one in the middle is the main jet, and the smaller jet out the the side, is the pilot jet. Sometimes the pilot jet is removable and sometimes it's fixed in place. Unscrew the main jet first and hold it up to the light to make sure it's clean if it's clogged use the solvent followed up with some compressed air.
If using the solvent and compressed air doesn't work in unclogging the jet, you're going to need to poke it clear with your wire. The Jets are made from of brass, which is a relatively soft material, so it's important that you're using an even softer material to clean them. If you have a really stubborn jet that you can't poke clear try soaking it for a few minutes in warm water mixed with the solvent.
Step 6
Below the main jet is the needle jet which also has a lot of small holes in it, you're going to want to follow the same procedure and use your solvent, compressed air and wire to make ensure that all the holes are clean.
Step 7

There is also the pilot jet which is the smaller jet beside the main jet. This is the smallest hole in the carburettor and it is the first part that will get plugged up, if the gas goes bad. Pay special attention to this jet because if it gets clogged, it will become very difficult to start the bike or tool you're using and it will not idle.
Step 8

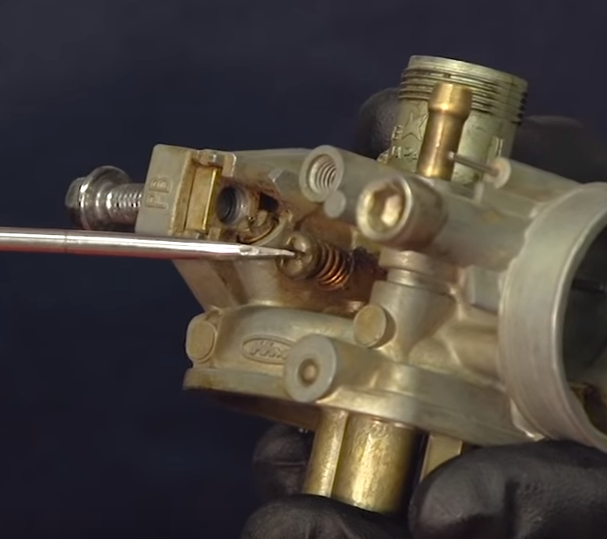
Next step is to remove the mixture screw, which works along side the pilot jet to metre fuel at idle and partial throttle. The mixture screw is shown in the image above at the end of the carburettor body.
Gently turn the mixture screw in and take note of the number of turns it takes to seat it. Write that number down, because you're going to need to reset the mixture screw when you put everything back together - once you've determined the number of turns it takes to seat it, remove the screw and note that there's often a spring and o-ring and a tiny washer in there as well.
Not to be mistaken with the idle screw which just works to set the height of the carburettor slide.
Step 9

Now with the carburettor body fully disassembled, it's time to spray cleaner through all the holes and passageways then follow that up with compressed air.
Step 10
And finally now that the carburettor is all nice and clean, all that's left is to now reassemble it. And don't forget to set your mixture screw.
While the parts of a carburettor may be in slightly different places and look a little different with each individual carburettor, the checklist for cleaning a carburettor is always the same. First you need to clean the main jet, following this by cleaning the pilot jet, then clean the passageways, check the needle and always reset your mixture screw. Also if you want to avoid gunking up your carburettor in the first place you may want to consider using a fuel stabiliser.
Top Tips to Remember

Don't let carburettor aerosol cleaner touch plastic or rubber seals.

Don't use anything that might scratch the float valve and seat when cleaning, replace the o-ring on the float valve seat if you pull the carb apart.
Watch the full video tutorial here at Motorcyclist Magazine.
still need help?

Our in house experts are always on hand for buying advice and to provide bespoke care, regardless of the application.
Call SGS on 01332 576 850 or fill out our contact form today.