


 4.4 out of 5 with 50,000+ reviews
  Free delivery on orders over £75*
  Next working day delivery available*
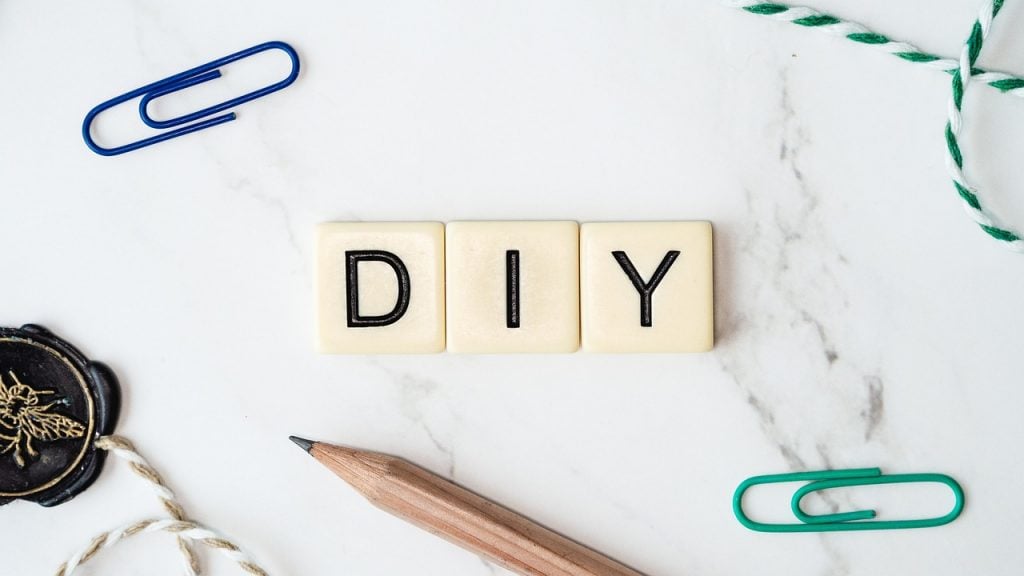
 Our guide of low-cost DIY jobs to spruce up your house
SGS Engineering looks into the jobs costing £10 or less that could make a noticeable improvement to your home
As tools experts, we understand how important it is for avid DIY-ers to keep their house looking in tip-top condition.
That said, the rising cost-of-living is making many things more expensive, and Brits might be finding it more difficult to justify extra expense on their homes unless they absolutely have to.
Fear not, as our internal team of experts have used all of their experience to think of ten quick DIY jobs that will cost £10 or less to implement – and every single one of them has the potential to make your house look great!
- Decoupage an old table to personalise it

Decoupaging normally refers to the act of covering a wooden surface with paper, for instance this can be a chance to modify an old coffee table with anything you like!
You could personalise an old wooden table with photos of family, newspaper cuttings from great sports victories, paper patterns you like – the possibilities are endless really.
It is probably best to use an old table for this – the job involves glue, so the table will never go back to how it was before if it goes wrong and it probably makes sense to upcycle an old one rather than modifying something that is already in a good condition.
- The first thing to do is to sand the table down, as any top layer on the wood may cause the decoupage to break off
- Once you’ve done this, you can apply the decoupage glue to the table, and then to the back of the paper.
- From here you just want to stick the paper down in the desired pattern, and then smooth it down with something flat.
- About half an hour later you can apply decoupage glue directly onto the paper, and maybe another layer again once this has dried
That’s it, your personalised table is ready! Feel free to sand the edges and paint the other areas of the table (you might want to do this before you start).
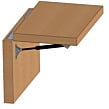
- Spruce up your bed’s headboard with rattan
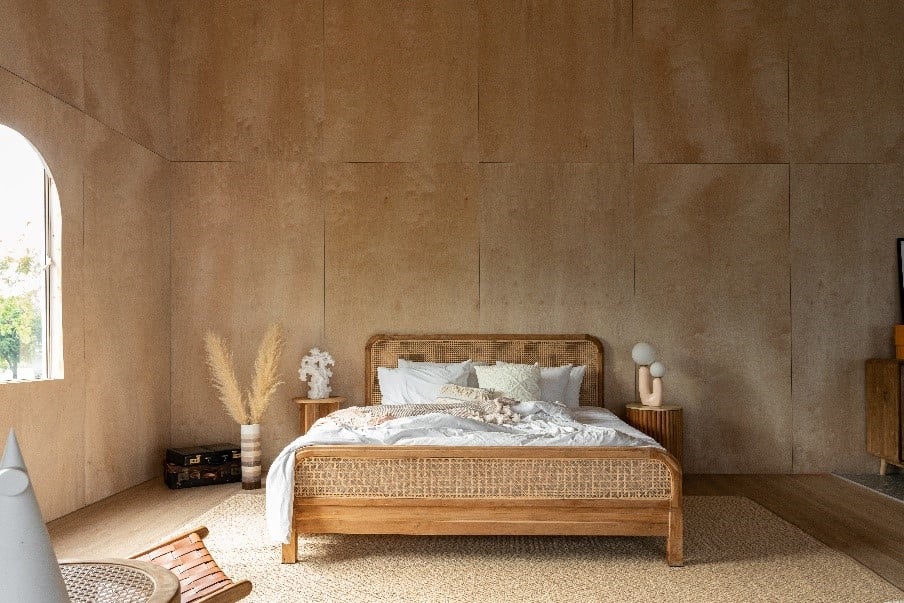
Rattan beds are very popular now, but anyone who is keen to get one has one issue – they’re normally quite expensive.
Luckily, it is quite easy to modify your standard wooden frame bed into something very similar for a fraction of the price.
- Firstly, place the sheet against your headboard to measure what size you will need and cut with a scissor, making sure you have a precise fit.
- Next, give the rattan a quick rinse and then staple it along the long sidebars.
- You can always refine the fit by tidying up the ends and cutting off any part of the sheet which extends beyond the sidebars, and you’re done!
- Upcycle your furniture with marble effect sheets
Buying a genuine marble top coffee table tends to be quite pricey – certainly falling outside of our £10 budget. Again, we can create something quite similar with an existing table by making a few modifications ourselves.
- Once you have found a retailer selling a plastic sheet with a marble effect (or any other effect you like!).
- Start by placing the sheet over the top of your table and tuck in the ends underneath.
- To make sure you have a tight fit, use a credit card or something similar to smoothen the edges (which hides the fact you’ve even used a plastic sheet in the first place).
And that’s it – you've just cleverly hidden all the old stains and scratches by placing a new layer over your table which not only looks stylish but is much cheaper than buying a new table!
4. Update your door handles

Changing door handles isn’t the most exciting DIY job, but it can make a massive difference to how things look in your home! As a bonus, it’s an easy job to take on if you are a DIY novice.
Some door handles are more expensive than others, but using free listings on social media and other sites can be a good way of picking up unique and fashionable door handles without spending anything.
Often, you’ll only need a screwdriver to remove the existing door handles, and to add in the new ones.
- Before you get started you will want to make sure that the door is held open about halfway by a door stop so you can access both sides easily.
- Then, remove the existing handle by either pushing the handle’s pressure release in with a screwdriver (look for a small slot in the side of the knob or handle) or by unscrewing the knobs or handles if you yours doesn’t have one.
- Remove any screws that are holding the cover plates in place and pry them off with a flat-head screwdriver.
- Next, take out the screws holding the inner latch and inner plates in place.
- Finally, pull out the latch plate and door latch mechanism and you should be left with holes in your door where you can install the new door handle!
- Measure this space before you buy your new handle as you will want to make sure that it fits and that it has similar plates (for example rectangular instead of circular).
- Follow the above steps backwards, putting the door handle back together and locking it in place with screws.
Your new door handle should be good to go!
- Filling paint dimples in your walls using a shower squeegee
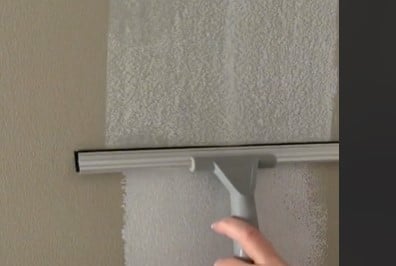
Paint dimples on your walls can be extremely frustrating, as rather than having nice smooth walls that look like they have been painted professionally, you have walls with a bumpy look – not ideal.
The good news is that you won’t need a painter and decorator to remedy the situation, and it shouldn’t take any time at all to fix. All you will need is a shower squeegee and new paint.
- Apply a good layer of fresh paint on the wall.
- Work it into and around the dimples by spreading it with the squeegee.
- Now just let it sit for a while and see the difference .
Your wall is looking much smoother again!
- Modernise old cabinets quickly

Upcycling videos on social media sites like TikTok have become extremely popular, with many people looking for ways to improve old furniture rather than paying for something new.
Some cabinets have legs with curved edges which can look old fashioned when aiming for a modern look. One way to modernise them is to use a jigsaw to cut the legs into a straight line.
- Don’t forget to wear safety googles and put your cabinet in a stable position before you get started.
- Then mark to draw a diagonal line across the cabinet legs with a marker and a ruler.
- Cut along the line with a jigsaw.
- The no longer wanted part should come off easily when you knock on it with a hammer afterwards.
That’s all – you just created a new look for your furniture on a budget.
- Sandpaper or scrape any wooden items/ surfaces that look weathered and re-varnish
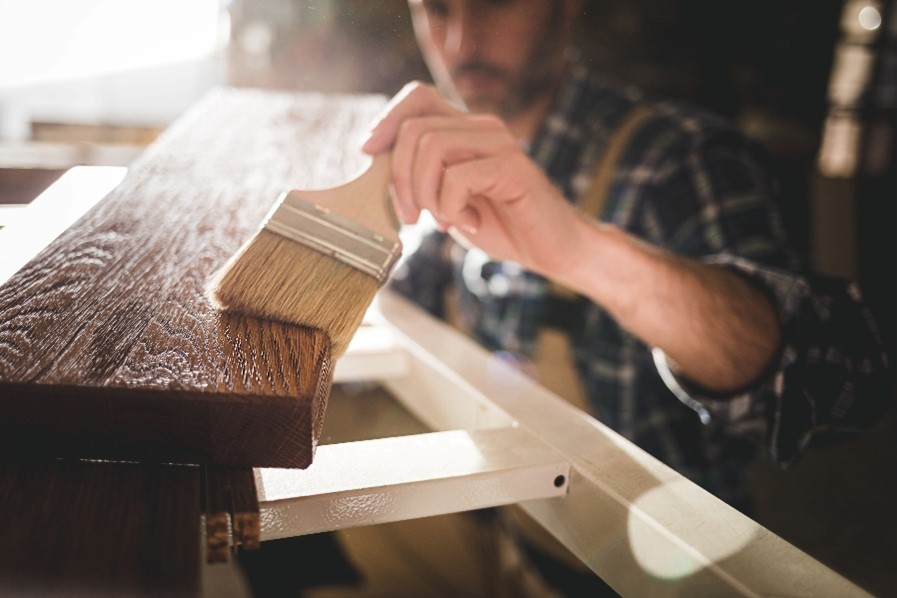
Re-varnishing any tired wooden items around your home can be a great way to keep things looking fresh and new.
Cabinets and tables can look significantly better with a simple scrape and re-varnish – making it well worth the effort.
Firstly, start off by scraping off any old varnish using a cabinet scraper or a chisel. While these tools need frequent sharpening, they tend to work faster than sandpaper.
Then, using a varnish of your choice, apply a fresh layer. On horizontal surfaces, you can apply it a bit thicker as gravity will help it level while on vertical surfaces you should use a little less.
When the first layer is dry it’s ready for some light sanding with a scraper. With water-based varnish, repeat this process three times, while softwood usually takes five coats.
Before the final coat, only sand lightly and make sure the surface is free of dust to ensure a smooth finish.
- Make a macrame plant hanger

Macrame plant hangers are extremely popular recently, and this one can be a fun activity to work on in your free time.
Helpfully, YouTubers have been posting tutorials for which you only need a short list of simple ingredients: Macrame cord, scissors, tape, plants and pots. Once you get the hang of it, you’re well on the way to being able to hang plant pots and other ornaments for a stylish décor.
- Refresh old tile grout

Not the most glamorous job on this list, but an important one, nevertheless.
Tile grout is the dense liquid that bonds and seals joints between tiles, most commonly found in kitchen or bathrooms. However, over time bacteria and dirt collects around the grout which can make them look faded or discoloured. Grout can be quite hard to clean using conventional methods.
Luckily, you don’t need to replace the tiles to get a fresh look! A tube of grout reviver can cost very little. Simply squeeze the tube over discoloured areas and wait for it to dry. Some grout revivers even provide anti mould treatment while giving your tiles a new look!
- Replace silicone around the house

Much like grout, the silicone around your shower and sinks will deteriorate over time and may eventually get damaged or break off. Before placing a new layer on top, it is recommended to remove all the old silicone first using a utility knife. Next, make sure to clear any residue that has been left behind and clean the area with denatured alcohol.
Before you apply the new seal, bring some tape and place it around all the edges you want to reseal to prevent spill over. Using new sealant, which you can pick up from your nearest DIY store for less than £10, slowly close the gap and smoothen the new finish with a caulking tool.
Summary
You don’t have to spend a lot of money to make your house look better! To make your home renovation projects even easier to complete, check out our hand tools section for all you need to become a DIY pro.