When our bosses tasked us with improving our knowledge of our leaf blower range, we could've spent hours looking through the various different product specs and codes – but we had a better idea. We’re the type of team who learn a lot quicker with a more hands-on approach and we felt we could get to know our tools better from the comforts of our office. Plus as it’s winter right now, indoors was much more appealing than braving the cold. So, after some deliberation, we of course decided to host our own game of ‘Leaf Blower Billiards’! Here’s how we did it:
The planning
The idea of playing leaf blower billiards and the logistics of it are two very different things – and as such required lots of planning to go into it. We spent a while head-scratching about various aspects such as the size and scale of the table, what balls we could use, where we could hold the game and more. 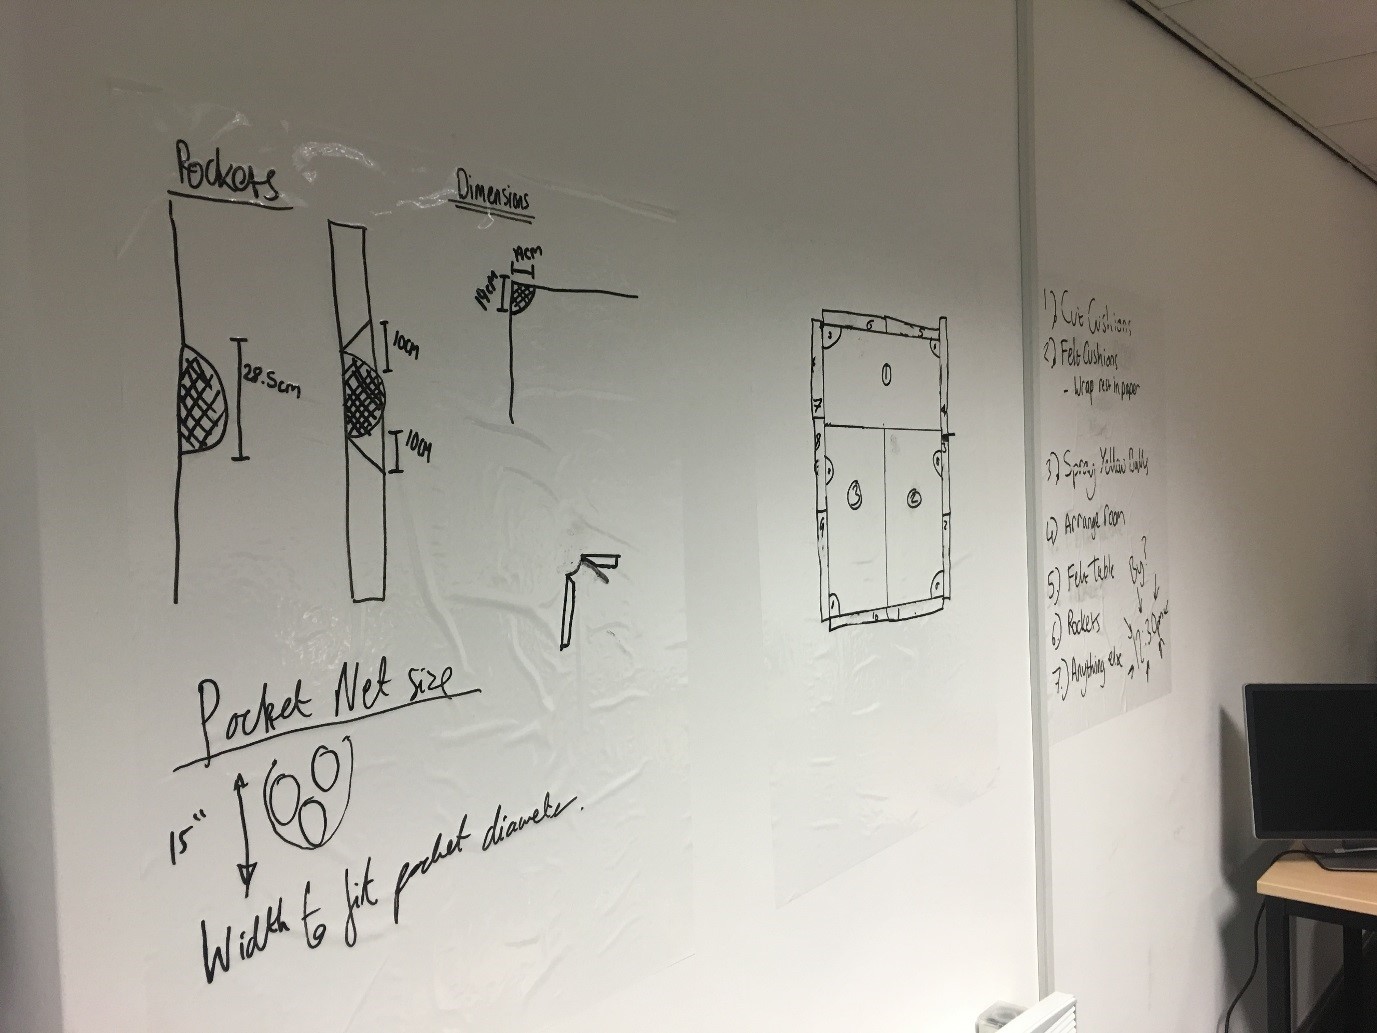 After a few measurements it was decided that our boardroom would be big enough to accommodate the table we needed to build. We then booked this out for a day under the guise of an ‘important business meeting’.
The testing process
Next up we started talking balls – ahem – more specifically what size and shape would work best getting blown (again, grow up) by our leaf blowers. Our cues of choice were the Ryobi One+, an 18volt cordless blower that gets up to 120mph. This meant the balls we used needed to be light enough to move, but strong enough to withstand smashing into one another. After trying everything from miniature basketballs, to footballs and tennis balls, we came to the decision to have our balls made for us. We then got in touch with the The Precision Plastic Ball Company who sorted us out with the right size, weight and shape we needed. 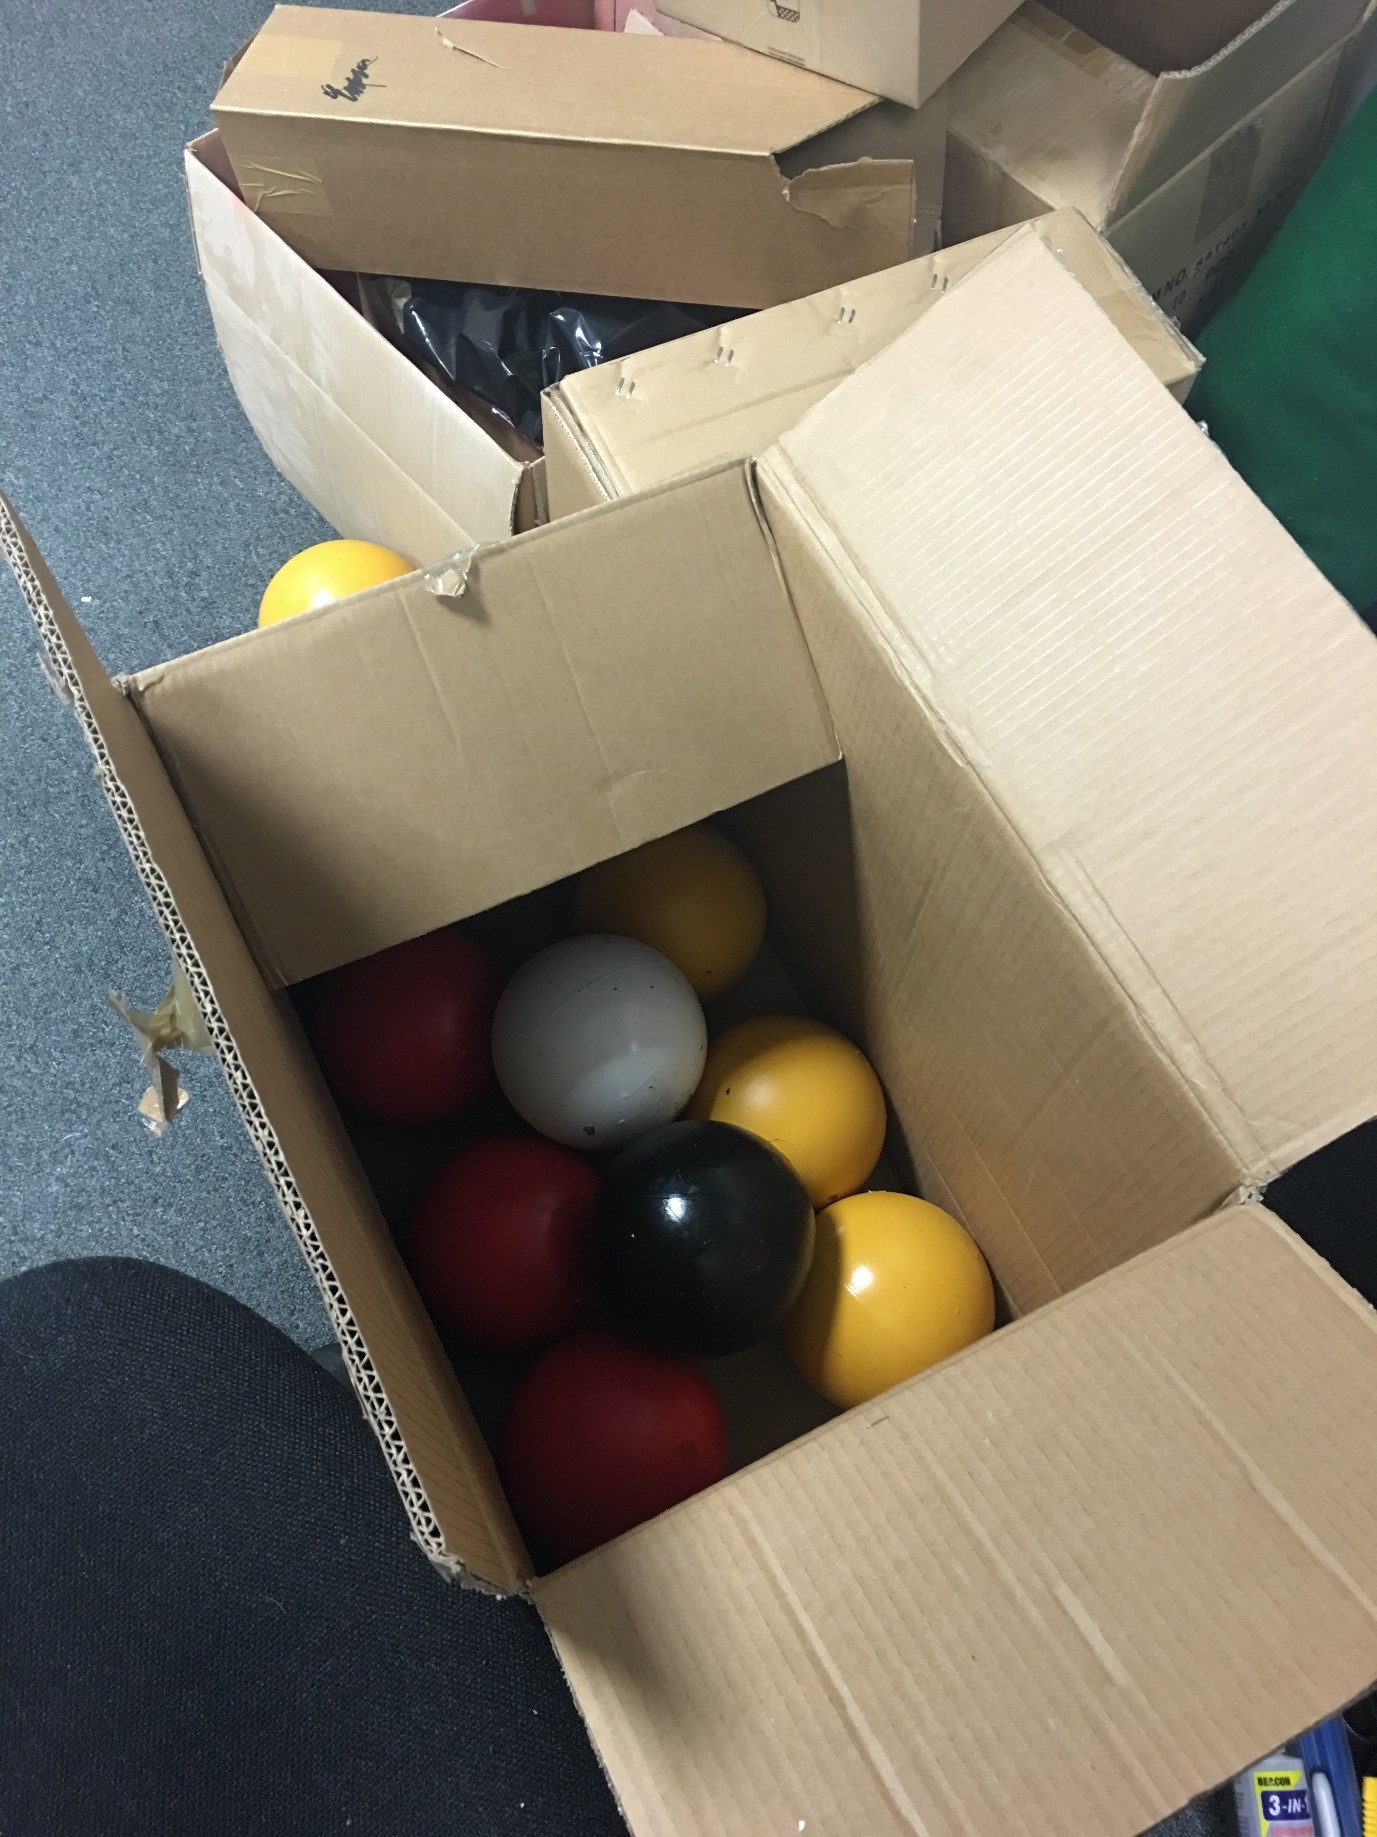
Final designs
With the right kit, we then finished the final designs for the table and gathered the materials we needed to build it. 
Construction begins
Starting with the table, we cut three sheets of mdf to size to make the playing surface. 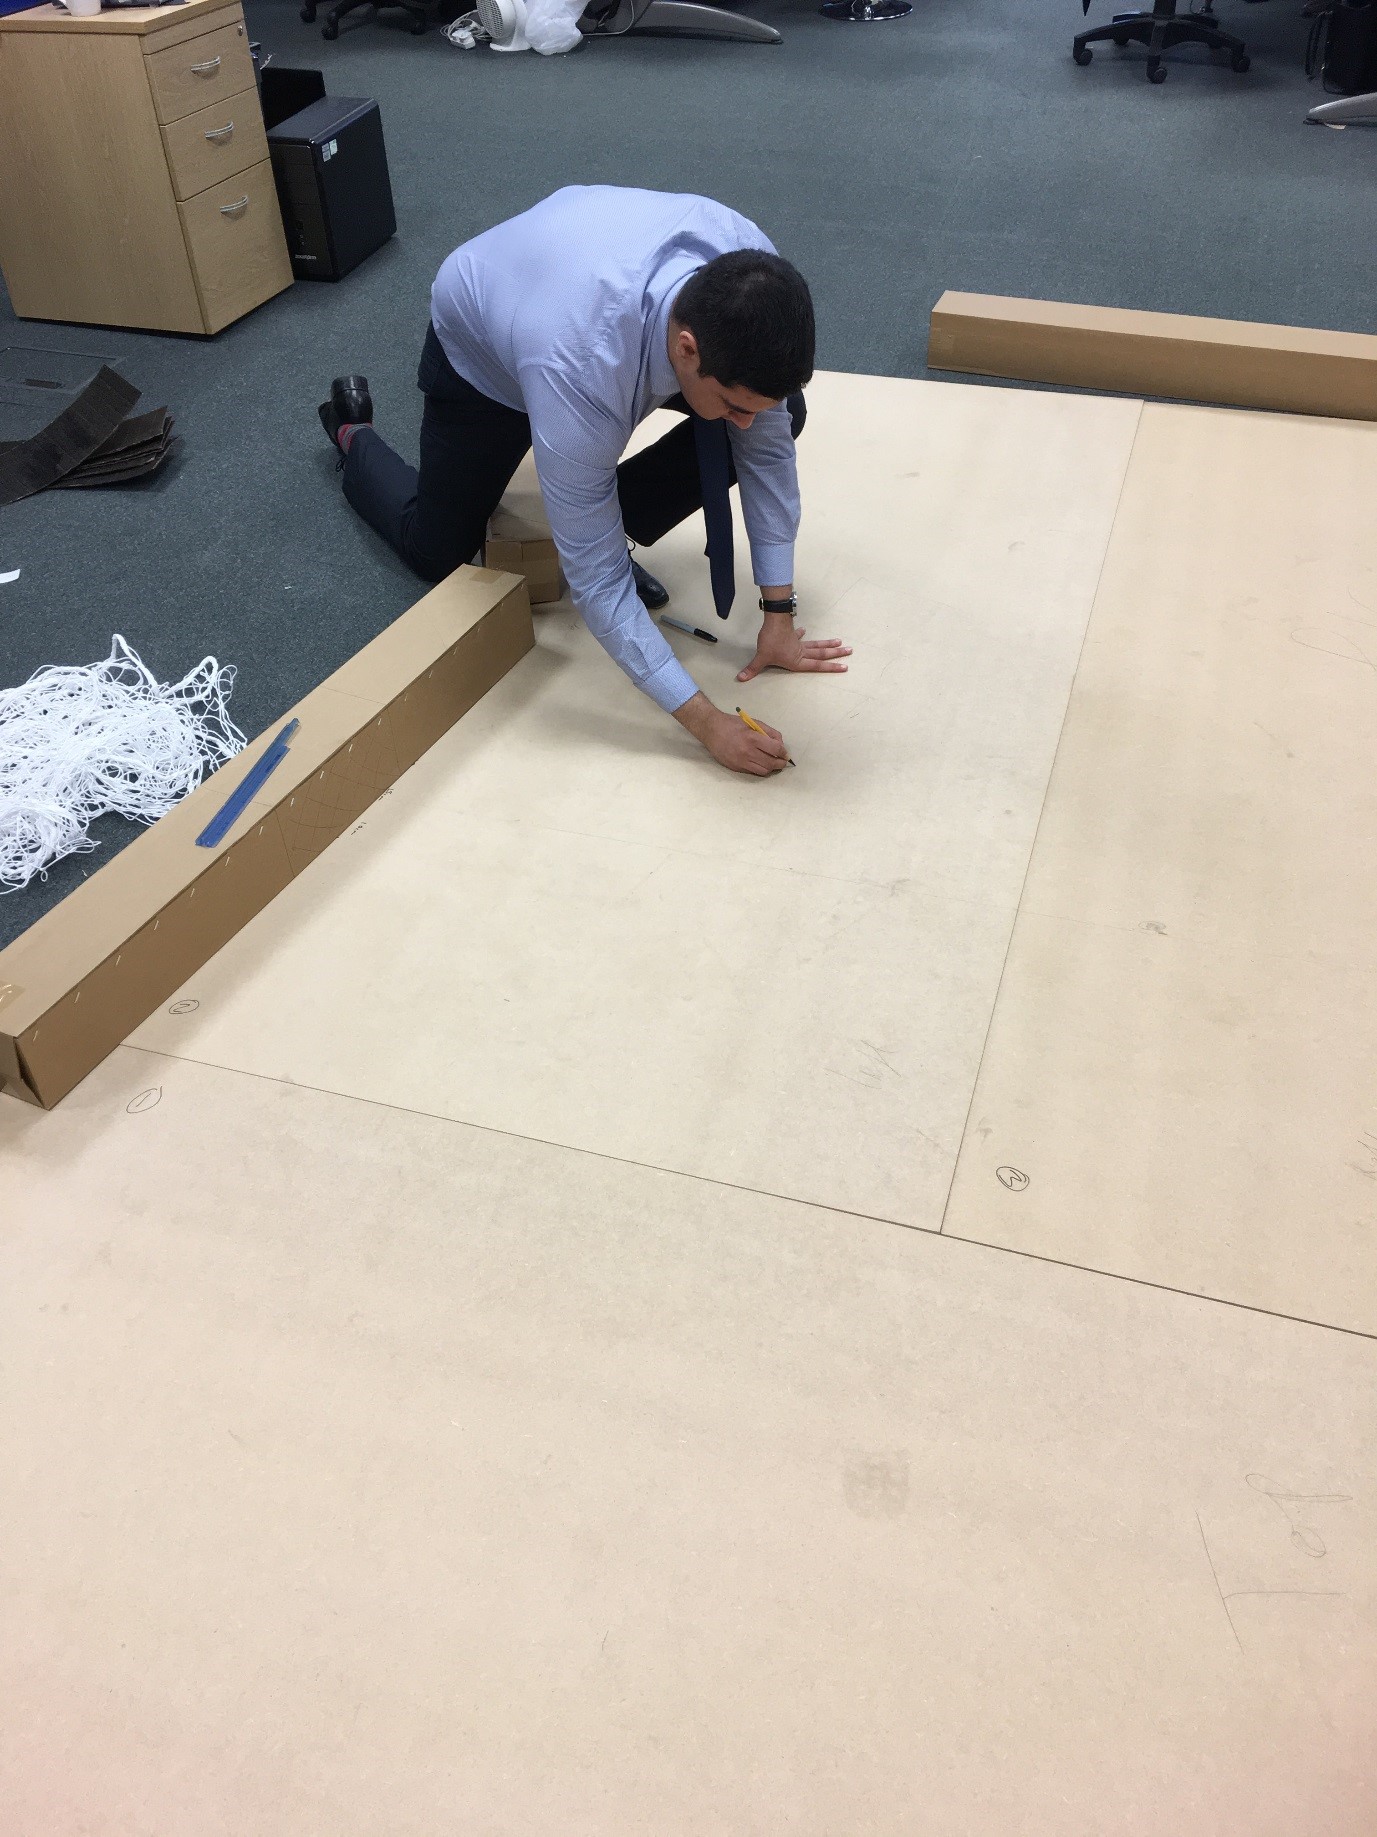 The cushions surrounding the edge of the table were made using cut-up cardboard boxes. To give them the nice wooden-eqse finish we’re used to seeing on a professional table we wrapped these in parcel paper.
 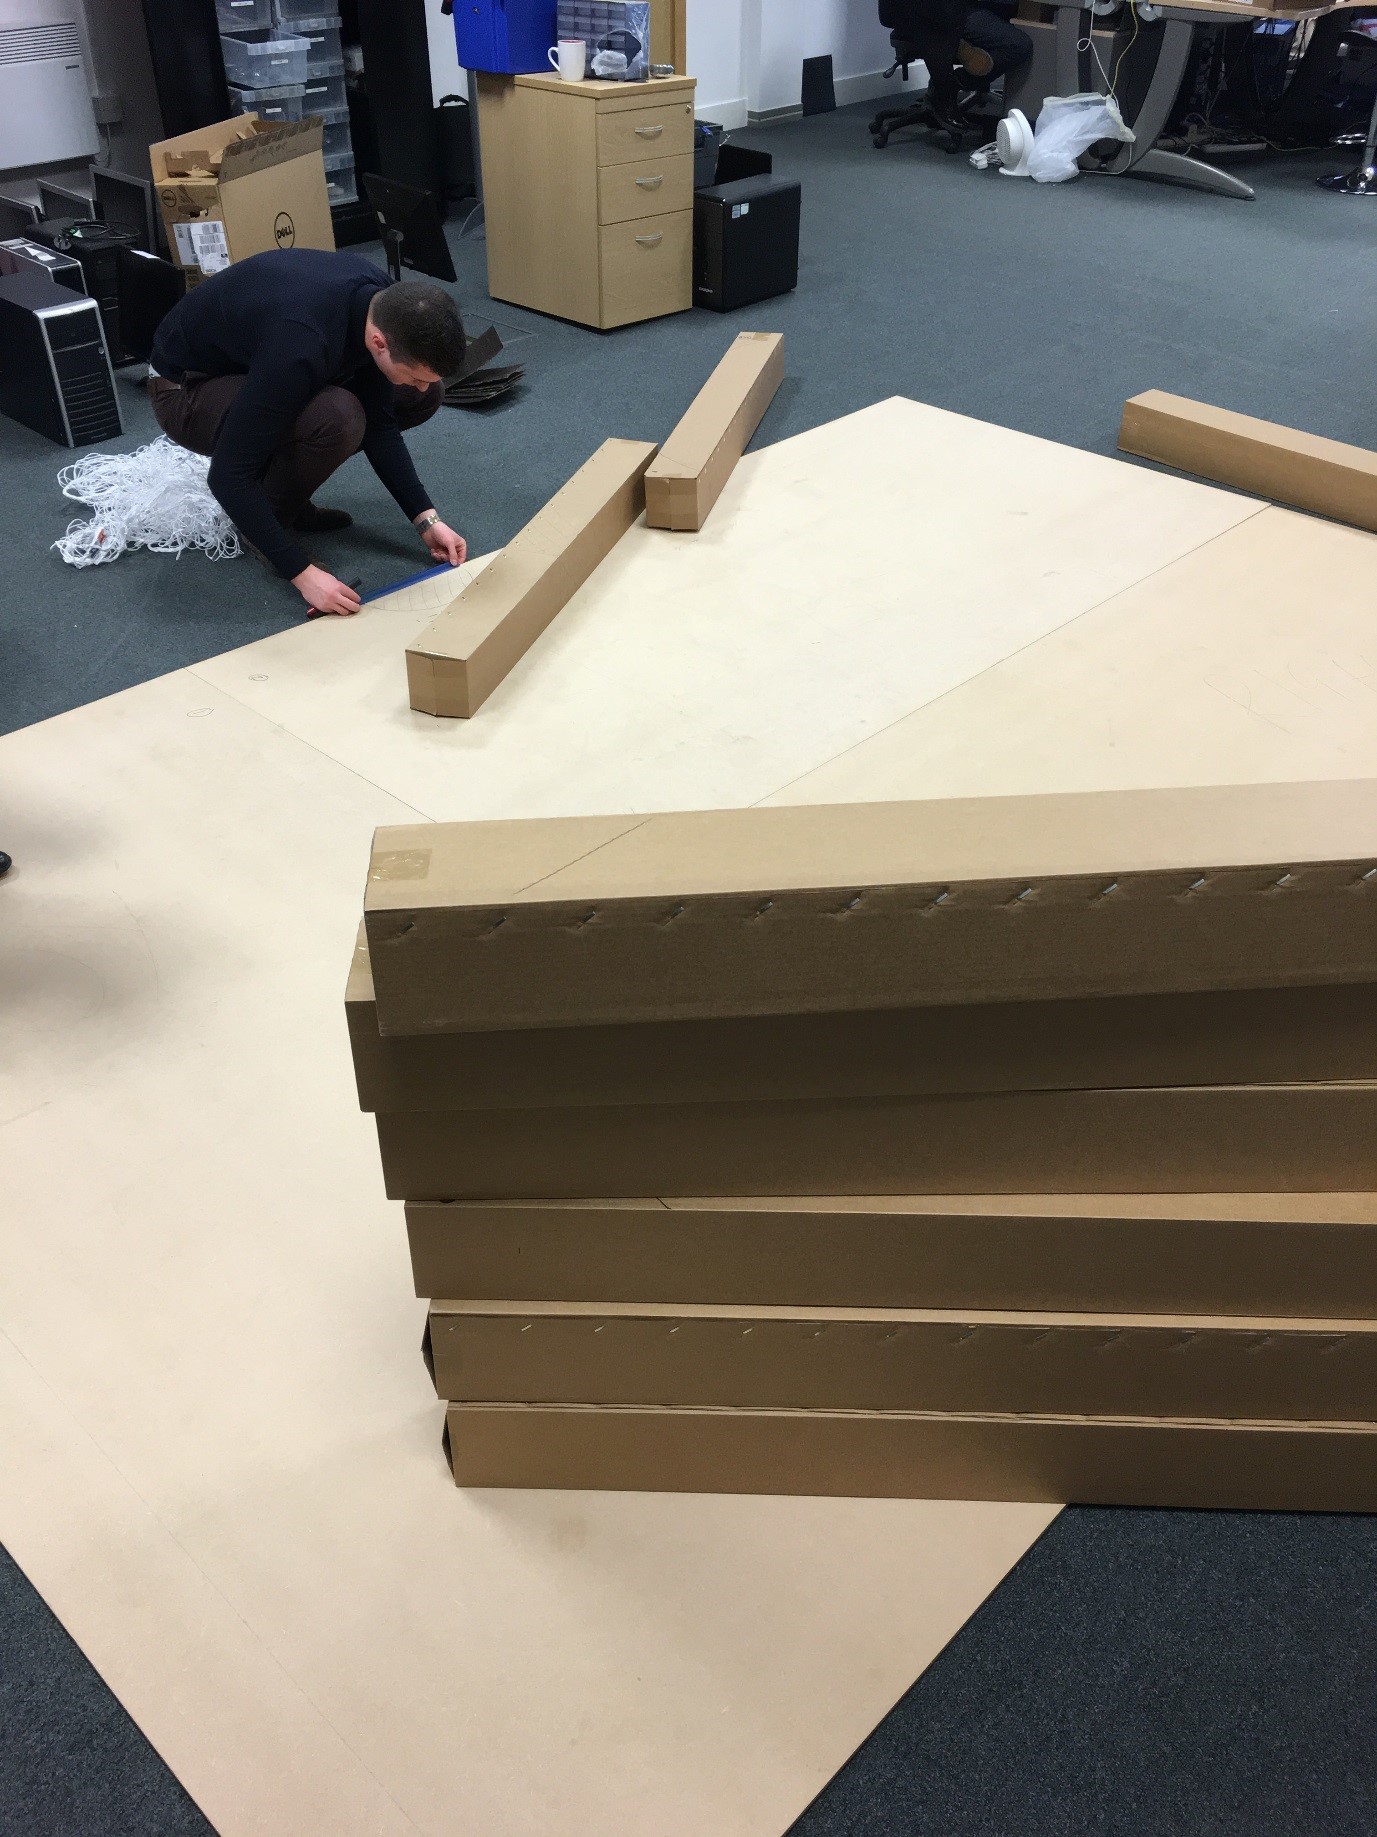 Next, we cut out the six pockets based on the circumference of the balls. As these were not your standard sized billiard ball, we also needed pockets that could handle the bigger, weightier ones we were using. So, we used a football net that we cut into sixths and tied onto each edge.
  To give the lush green finish you expect to see on a billiards table we bought two extra-large rolls of green felt that we cut to size and intricately sealed with staples and a glue gun.
  As you can see it certainly left us with a rather smart looking surface.
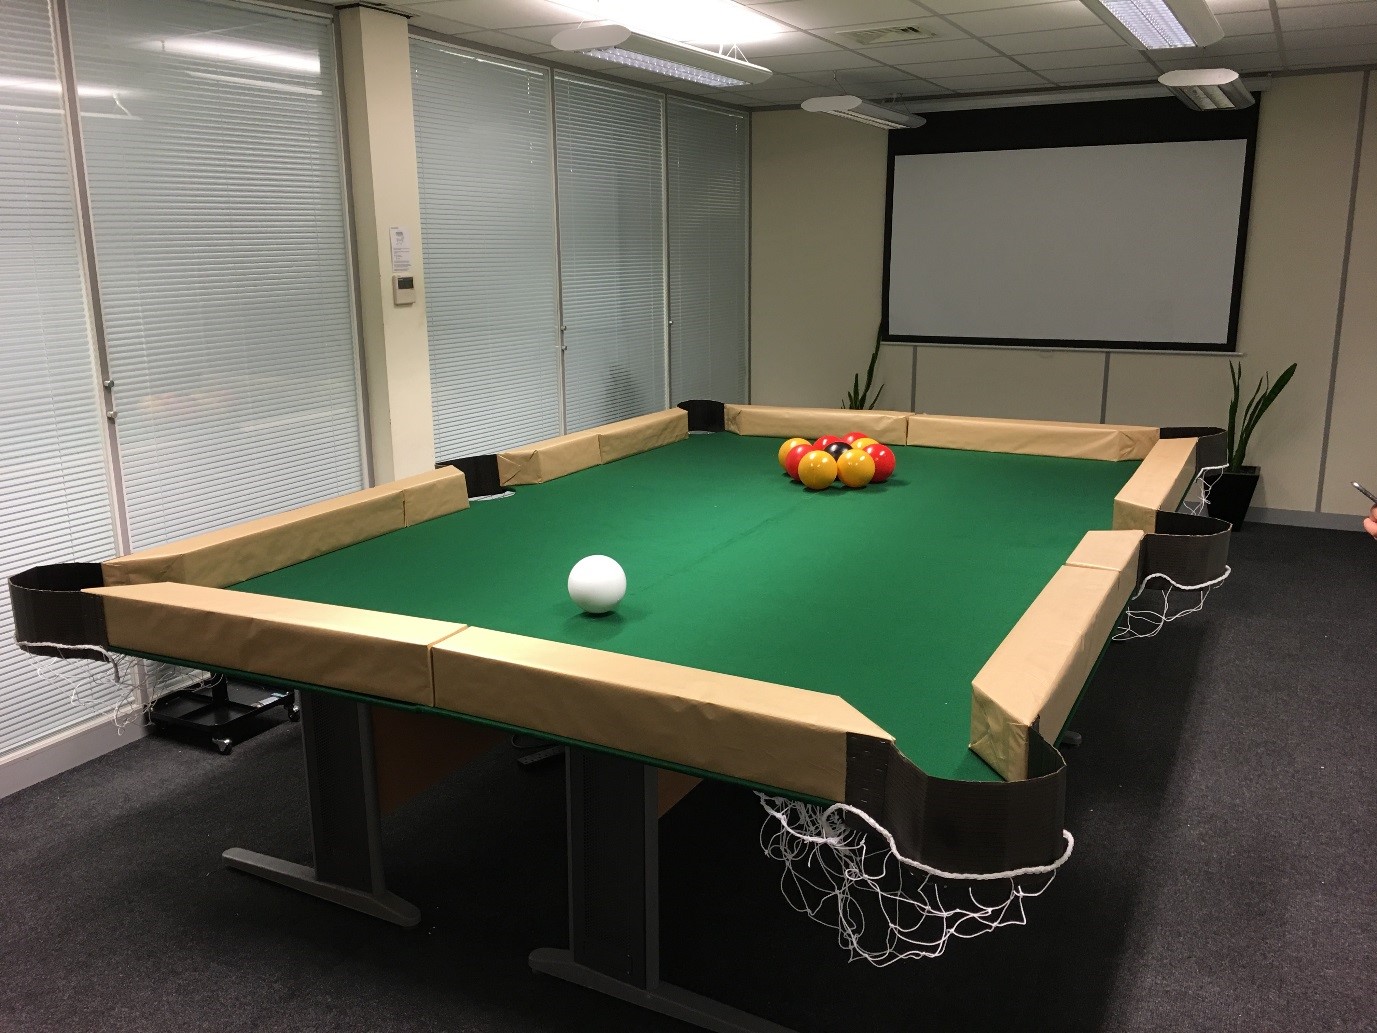
 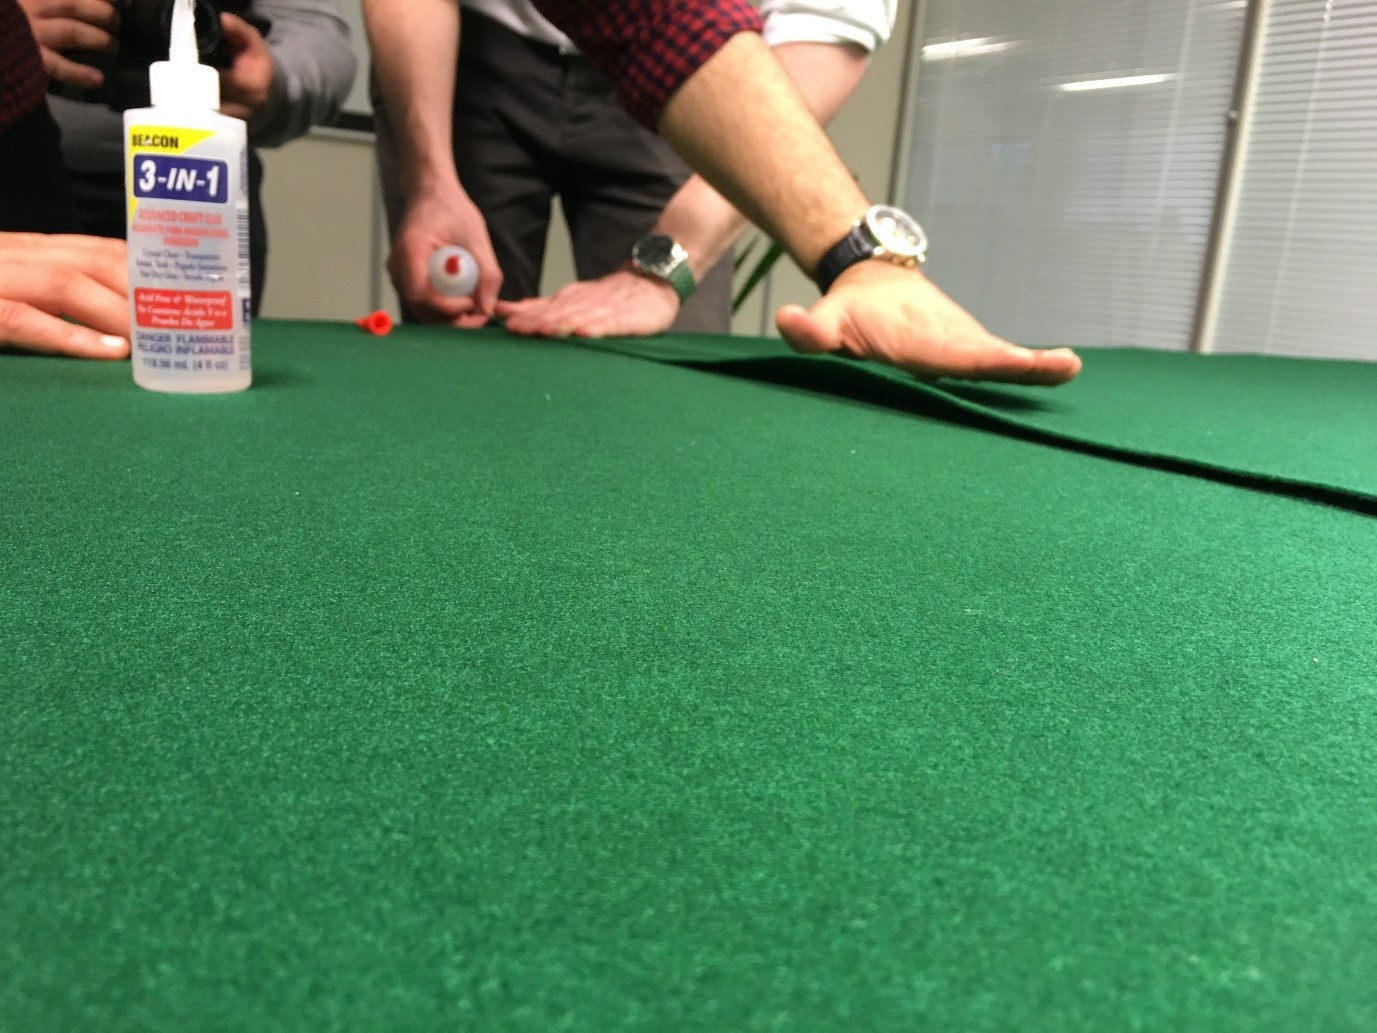 With the top now finished, we secured all the cushions and pockets in place.
 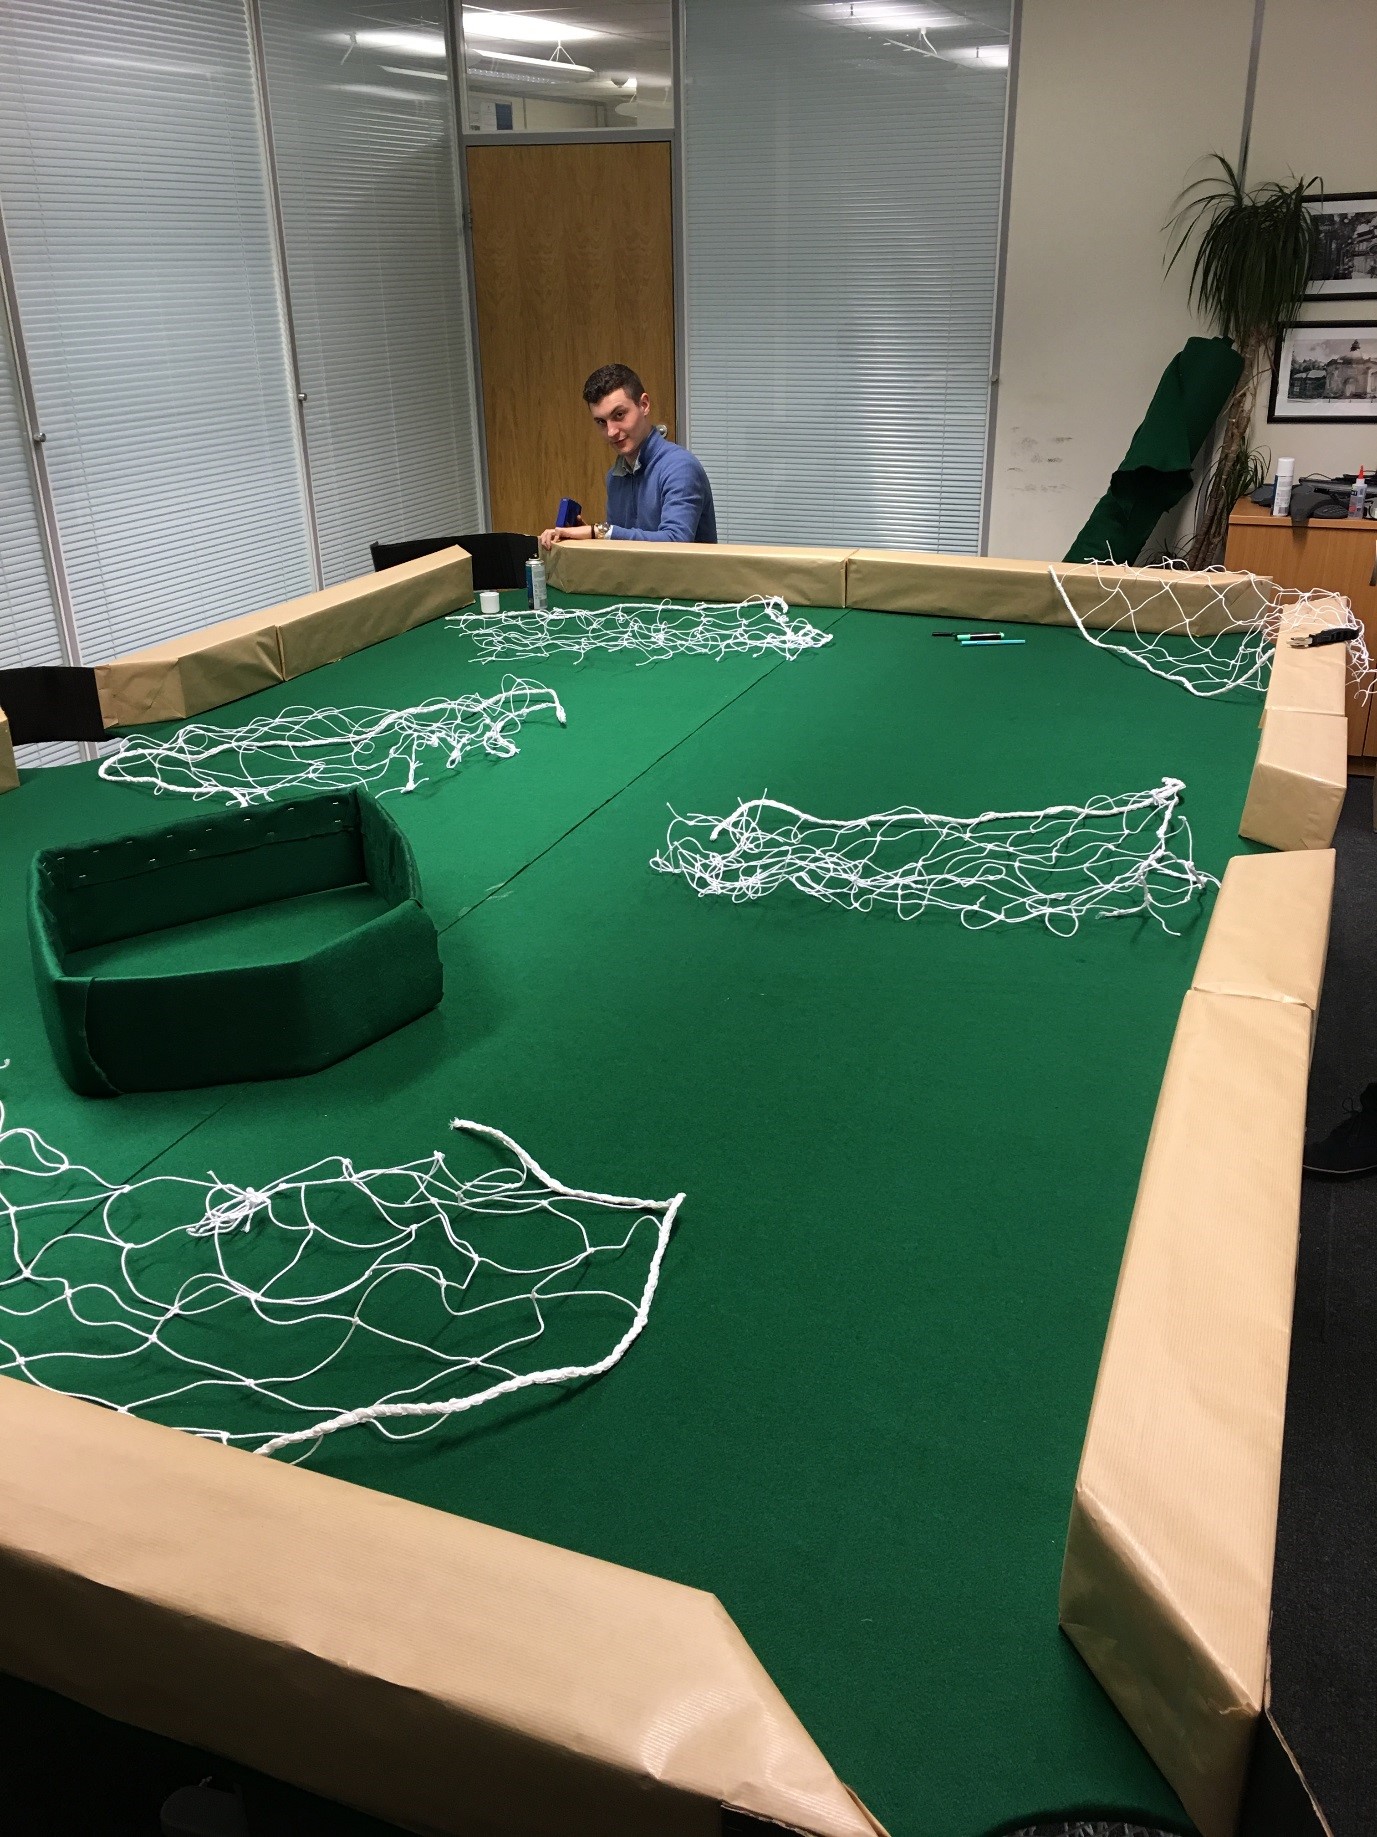 Lastly, we straightened the table, racked up the balls and this was the finished result.