


 4.4 out of 5 with 50,000+ reviews
  Free delivery on orders over £75*
  Next working day delivery available*
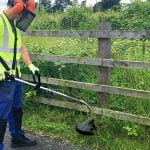
 How to Start a Strimmer Safely and Correctly
Here at SGS we know that if you've not used a petrol strimmer before, getting a 2-stroke engine going for the first time can be a little daunting. See our picture how-to guide , for our easy step-by-step instructions for getting your SGS Strimmer running.

Mixing Your Fuel

Your strimmer runs off a mix of semi-synthetic 2-stroke oil and unleaded petrol (40:1). Our petrol tools come with a measuring jug with guide lines. Find the side marked 40:1, add your petrol to the first line and your 2-stroke oil to the second. Replace the jugs lid and shake the mixture for around a minute.
Adding Your Fuel

Remove the fuel cap from your strimmer and add the fuel mixture. You should fill your tank around ¾ to the top.
Prime
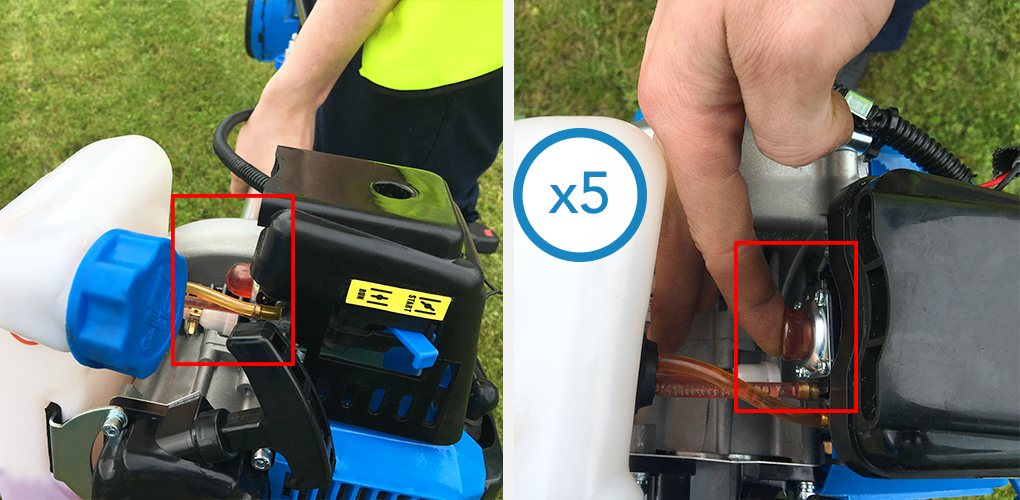
Press the priming bulb 5 to 8 times. This will help the strimmer start with less pulls of the starter cord. If you can’t see fuel entering the priming bulb, check “Troubleshooting: Check the Tank Filter”.
Switch On
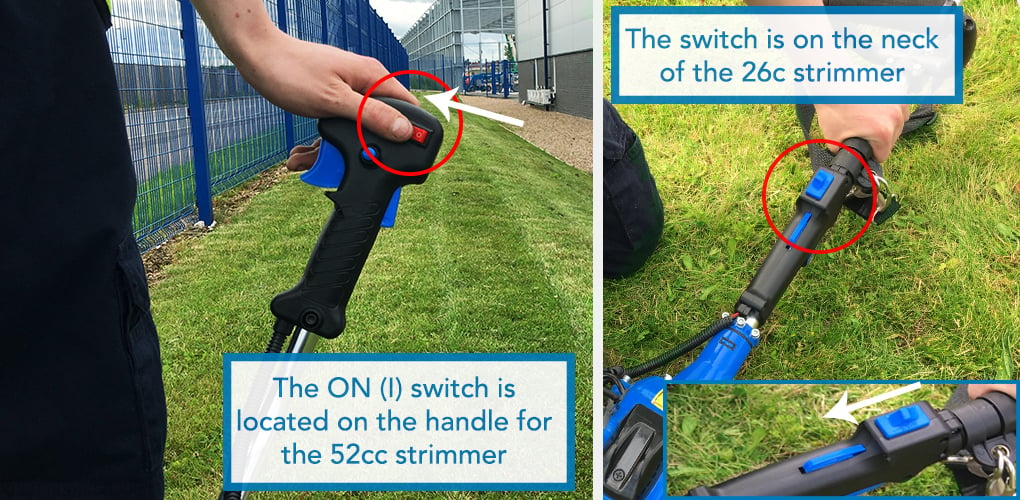
Move the strimmers switch to the On (I) position.
Set the Choke

For a cold engine, move the choke to the “Start” position (closed). Squeeze the throttle lever once.When re-starting the strimmer (warm engine) you can move the choke straight into the “Run” position (open).
Pull Start

Place the strimmer on the ground so the pull start is facing up towards you. Make sure the cutting attachment is not touching the ground or might catch on any other object.Firmly hold the neck of the strimmer with your left hand and the pull start assembly with your right. The strimmer should start within 3-5 pulls on a new or cold engine. Slowly pull the starting rope with your right hand until you feel the resistance of the rope. Now, pull the pull start hard several times until the engine fires and starts.Pull the rope up as vertically as you can. Don’t let the rope drag on the casing of the strimmer.
Open the Choke

Once the machine is running, move the choke to the “Run” position (open)/ Squeeze the throttle to rev the strimmer and then let your machine idle for a 30- 40 seconds. Your strimmer should now be ready to use.
Troubleshooting
If your strimmer hasn't started using the standard starting procedure, there's a a couple of things you can quickly check and try.
Checking the Fuel Mix
The most common problem with a strimmer not starting is that there's a problem with the fuel mix. Double check that you've used 40 parts fresh unleaded petrol to 1 part 2-stroke oil (40:1). Check the petrol you've used isn't stale.
Adjusting the Carburetor
Your strimmer needs a balanced combination of air and fuel reaching the carburetor. This balance needs to be consistent at all times otherwise your chainsaw will bog down when trying to start, and then die. If you hear the engine bog when you pull the trigger, the carburetor needs adjusting via the carb adjustment screw.
- Locate the adjustment screw on your machine (see images below).
- Wind the carb screw all the way in (clockwise).
- Wind the carb screw 1.5 - 2 turns anti-clockwise.
- Restart the starting procedure
This is the most common set up for the carburetor, however you can fine tune it depending on how your strimmer is running:
- Erratic idling behaviour or poor acceleration - the engine needs more fuel so turn the adjustment screw anticlockwise until the engine runs and accelerates smoothly.
- Excessive exhaust smoke when idling - the engine is running too rich, so you need more air reaching the carburetor. Turn the adjustment screw clockwise until the engine speed drops. Now check that the engine still accelerates smoothly when you apply the throttle.
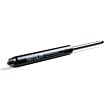
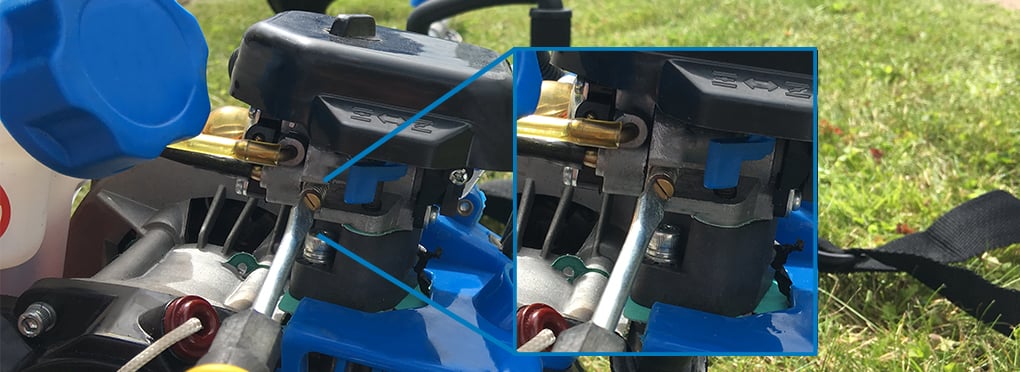
52cc Strimmer Carb Adjustment Screw Location:

52cc strimmer carb adjustment screw location. You will have to remove the casing to get access to it.
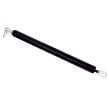
26cc Strimmer Carb Adjustment Screw Location:
26cc strimmer carb adjustment screw location.
Check to see if the Engine is Flooded
There's a chance that if you've over used the pull start mechanism, you may have flooded the two-stroke engine. This is very simple to check and fix.
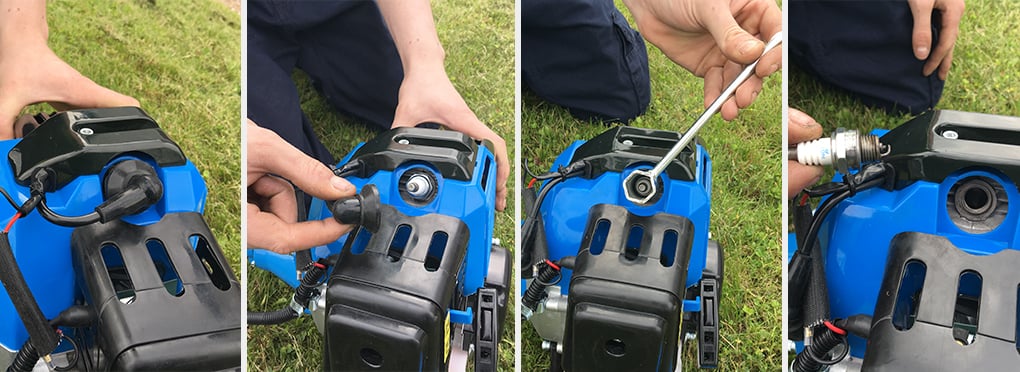
Open up the casing and remove the black lead that covers the plug.
If the spark plug is damp with fuel then the engine is flooded. Remove the plug, and allow the excess fuel to evaporate.
Replace the plug and follow the usual starting procedure.
Check Your Strimmer has a Spark
To find out whether the sparkplug of your strimmer is producing a spark, follow these simple steps.
Expose and Remove the Spark Plug

Remove the top cover of your strimmer or chainsaw, exposing the spark plug.
Pull the spark plug wire off the plug and remove the spark plug with the wrench included in your toolkit.
Check the Spark Plug is Igniting

Place the spark plug back into the spark plug wire.
Hold the boot end of the sparkplug wire with your hand and place the electrode tip against a metal surface.
Make sure your tool is switched on. Using your other hand (or with the help of another person) pull the starter cord quickly. If the ignition is working correctly you should see blue sparks where the plug is touching the metal surface.
If you don't see a spark you can contact our customer service team through this form.
Check the Tank Filter
If you can’t see fuel in the priming bulb, there’s a good chance your tank filter is blocking the fuel mix from moving to the engine.
- Open up the fuel tank
- Dislodge the fuel filter from the neck of the tank (you might find this easier if you drain the fuel and remove the blue lid)
- Restart the starting procedure
Still need help?

Our in house experts are always on hand for buying advice and to provide bespoke care, regardless of the application.
Call SGS on 01332 576 850 or fill out our contact form today.