


 4.4 out of 5 with 50,000+ reviews
  Free delivery on orders over £75*
  Next working day delivery available*
 How to Set Up & Use an Air Compressor Safely
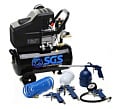
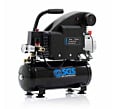
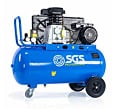
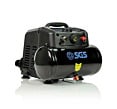
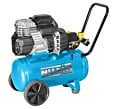
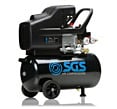
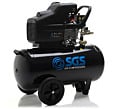
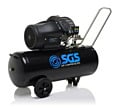
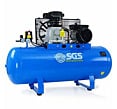
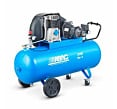
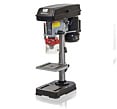
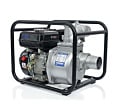
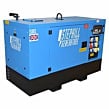
Air compressors are great for a wide range of work tasks, such as: drilling, hammering, sanding, grinding, cutting, nailing, stapling, wrenching and more. They can be used by amateur D.I.Y enthusiasts, right through to trade experts and industrial users. We have a huge range of compressors and air tools available. Once you have found the perfect air compressor for your needs, the next step is knowing how to safely set it up and use it.
1. Safety

Remember safety wear, such as glasses and safety boots. Safety boots are especially important if you are moving heavy work/materials, and/or using air fed nailers and staplers for your work.
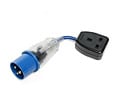
2. No Extension Leads

Do not use a power extension lead - use a hose reel extension instead. The reasoning for this is an air compressor will have voltage dropouts if its mains lead is longer than what is manufactured. Using air hose extensions is a much better idea, as it gives you the benefit of being able to manoeuvre your air tool around the work space. It's important to consider the right air hose for the job, read our air compressor hose buying guide here.
3. Check Oil Level
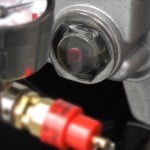
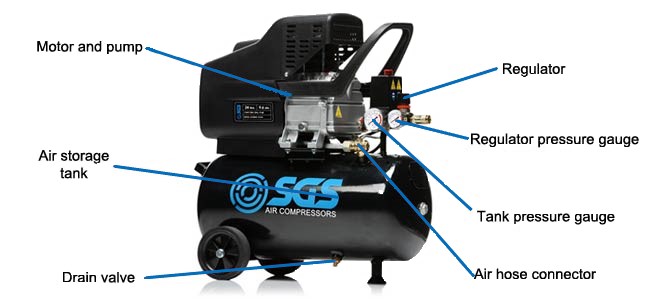
The compressor oil level can be viewed through the sight glass. The oil level should be about the same level as the 'red dot'. If it isn't the same level and requires topping up, remove the air bung (see step 5), and top up slowly. It's important to keep your air tools regularly lubricated too, to protect the tool and extend its working life. You can add our all in one filter, regulator and lubricator.
4. Attach air filter

An air filters job is to keep your air supply clean, which is especially important when carrying out tasks like paint spraying. It also safeguards the compressor components from environmental airborne debris, minimizing compressor downtime and/or repairs.
5. Insert oil bung

Insert the air bung into the top of the motor. The air bung acts as a vacuum for the oil part of your compressor, and allows the system to 'breathe' properly.
6. Power On

Pull the compressor power switch up. If you need to stop the compressor then simply push the switch down.
7. Fill the Tank

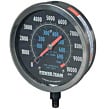
Once the compressor is on the tank will automatically fill to its maximum pressure of 8bar. The compressor will then switch itself off until you start using the air supply with you tool, and automatically switch back on again when the tank needs to be refilled.
8. Connect an Air Hose
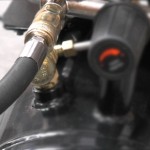
Plug in an air hose. Our compressors all use standard Euro type quick release fittings.
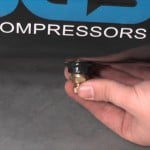
9. Connect an Air Tool

Plug the air tool you want to use onto the air hose. If you are not using an in-line oiler then add a few drops of oil into the coupler, and add oil again after about 10-15 mins of using the tool.
10. Set Regulator

Turn the air regulator clockwise to the desired pressure. Consult each tools relevant manual to find the right operating pressure.
11. After Use

When you have finished with your air compressor, turn the air regulator anti clockwise to close the valve off.
12. Power Off

Push the compressor power switch off. Unplug the compressor from the power socket, always allow the unit to cool down before storing anywhere, as the motor does get quite hot during operation.
13. Drain the Tank
Drain the air and moisture using the bleed valve underneath the tank after each use. This stops any moisture getting into your work via any air tools that are connected.
14. Thermal Cut Off

The thermal cut-out reset switch can be located near the oil sight glass, should your compressor get too hot and cut out.
It's really important to look after yourself, others around you, and your air compressor equipment. As with any and all machinery, your compressor will require routine maintenance to ensure that it operates at optimum levels. So have a look at our SGS Engineering Air Compressor Maintenance Tips below.
Read and Follow Your Air Compressor’s Manual
Nothing damages an air compressor faster than an owner who doesn’t properly read through the product manual. An air compressor is typically a very low maintenance machine, however you'll find in the product manual that there’s going to be some simple tips, that will assist you to get a nice long life out of your air compressor. Also, if you don’t follow the rules in your air compressor manual there’s a chance that you’ll void your 2 year warranty.
Clean/Replace air Intake Filter
A dirty air filter, can mean that the intake valve has to work much harder to suck the air in. Ensure that the intake filter of your compressor is clean at all times, especially if you’re operating it in a dirty or dusty environment such as a garage or workshop. Find your machine's air filter and remove by pinching it out with your fingers or by removing the screw(s) that attach it to your compressor. Installing the new filter should be as easy as performing the reverse of the removal process.
Drain off Condensate and Moisture
Any air compressor tank will accumulate moisture from the air that is being compressed, and even more so if you use the compressor in a particularly humid environment. Most tanks have a valve for draining the moisture that accumulates and it’s imperative that you ensure this is drained regularly. Before draining the water you should be sure to release the air pressure from the tanks.
Check all Hoses and Valves
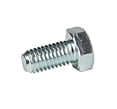
All your hoses and valves need checking periodically. If they become cracked or corroded they can leak air and therefore put a strain onto the rest of your air compressor’s components, as it struggles to keep up with the demand. Be sure to replace them if you find them cracked or damaged, they cannot be repaired, replacing is the most efficient way to deal with the damage. You may find that as the air compressor is running and therefore vibrating the engine may it can loosen the screws, nuts and bolts. That;s why they should be checked periodically and tightened up on a regular basis.
Check/Change Engine Oil
Remove the fill cap, allowing air into the system, then remove the plug from the compressor tank and let the oil drain into a container. Once all of the old oil has been removed, replace the drain plug using an adjustable wrench. Now, slowly and carefully fill your machine with a high-quality air compressor oil or your manufacturer's recommended oil. Take your time and make sure the compressor receives the correct amount. This should be done on average every 7000 hours of use, or if you're an infrequent user, a very minimum of once a year.
For the longevity of your air compressor;

Repairs must only be carried out by a qualified engineer, If problems occur, contact us at SGS Engineering, on (+44) 01332 576 850.

Before starting any maintenance on your compressor, always be sure that the pressure is released from the air tank, and that the compressor is disconnected from any electrical supply.

Do not leave pressure in the tank overnight, or when transporting.

Do not operate in a wet or damp environment. Keep your compressor dry at all times. Having clean air will allow your compressor to work optimally. Do not use in dusty or dirty locations.
Still need help?

Our in house experts are always on hand for buying advice and to provide bespoke care, regardless of the application.
Call SGS on 01332 576 850 or fill out our contact form today.